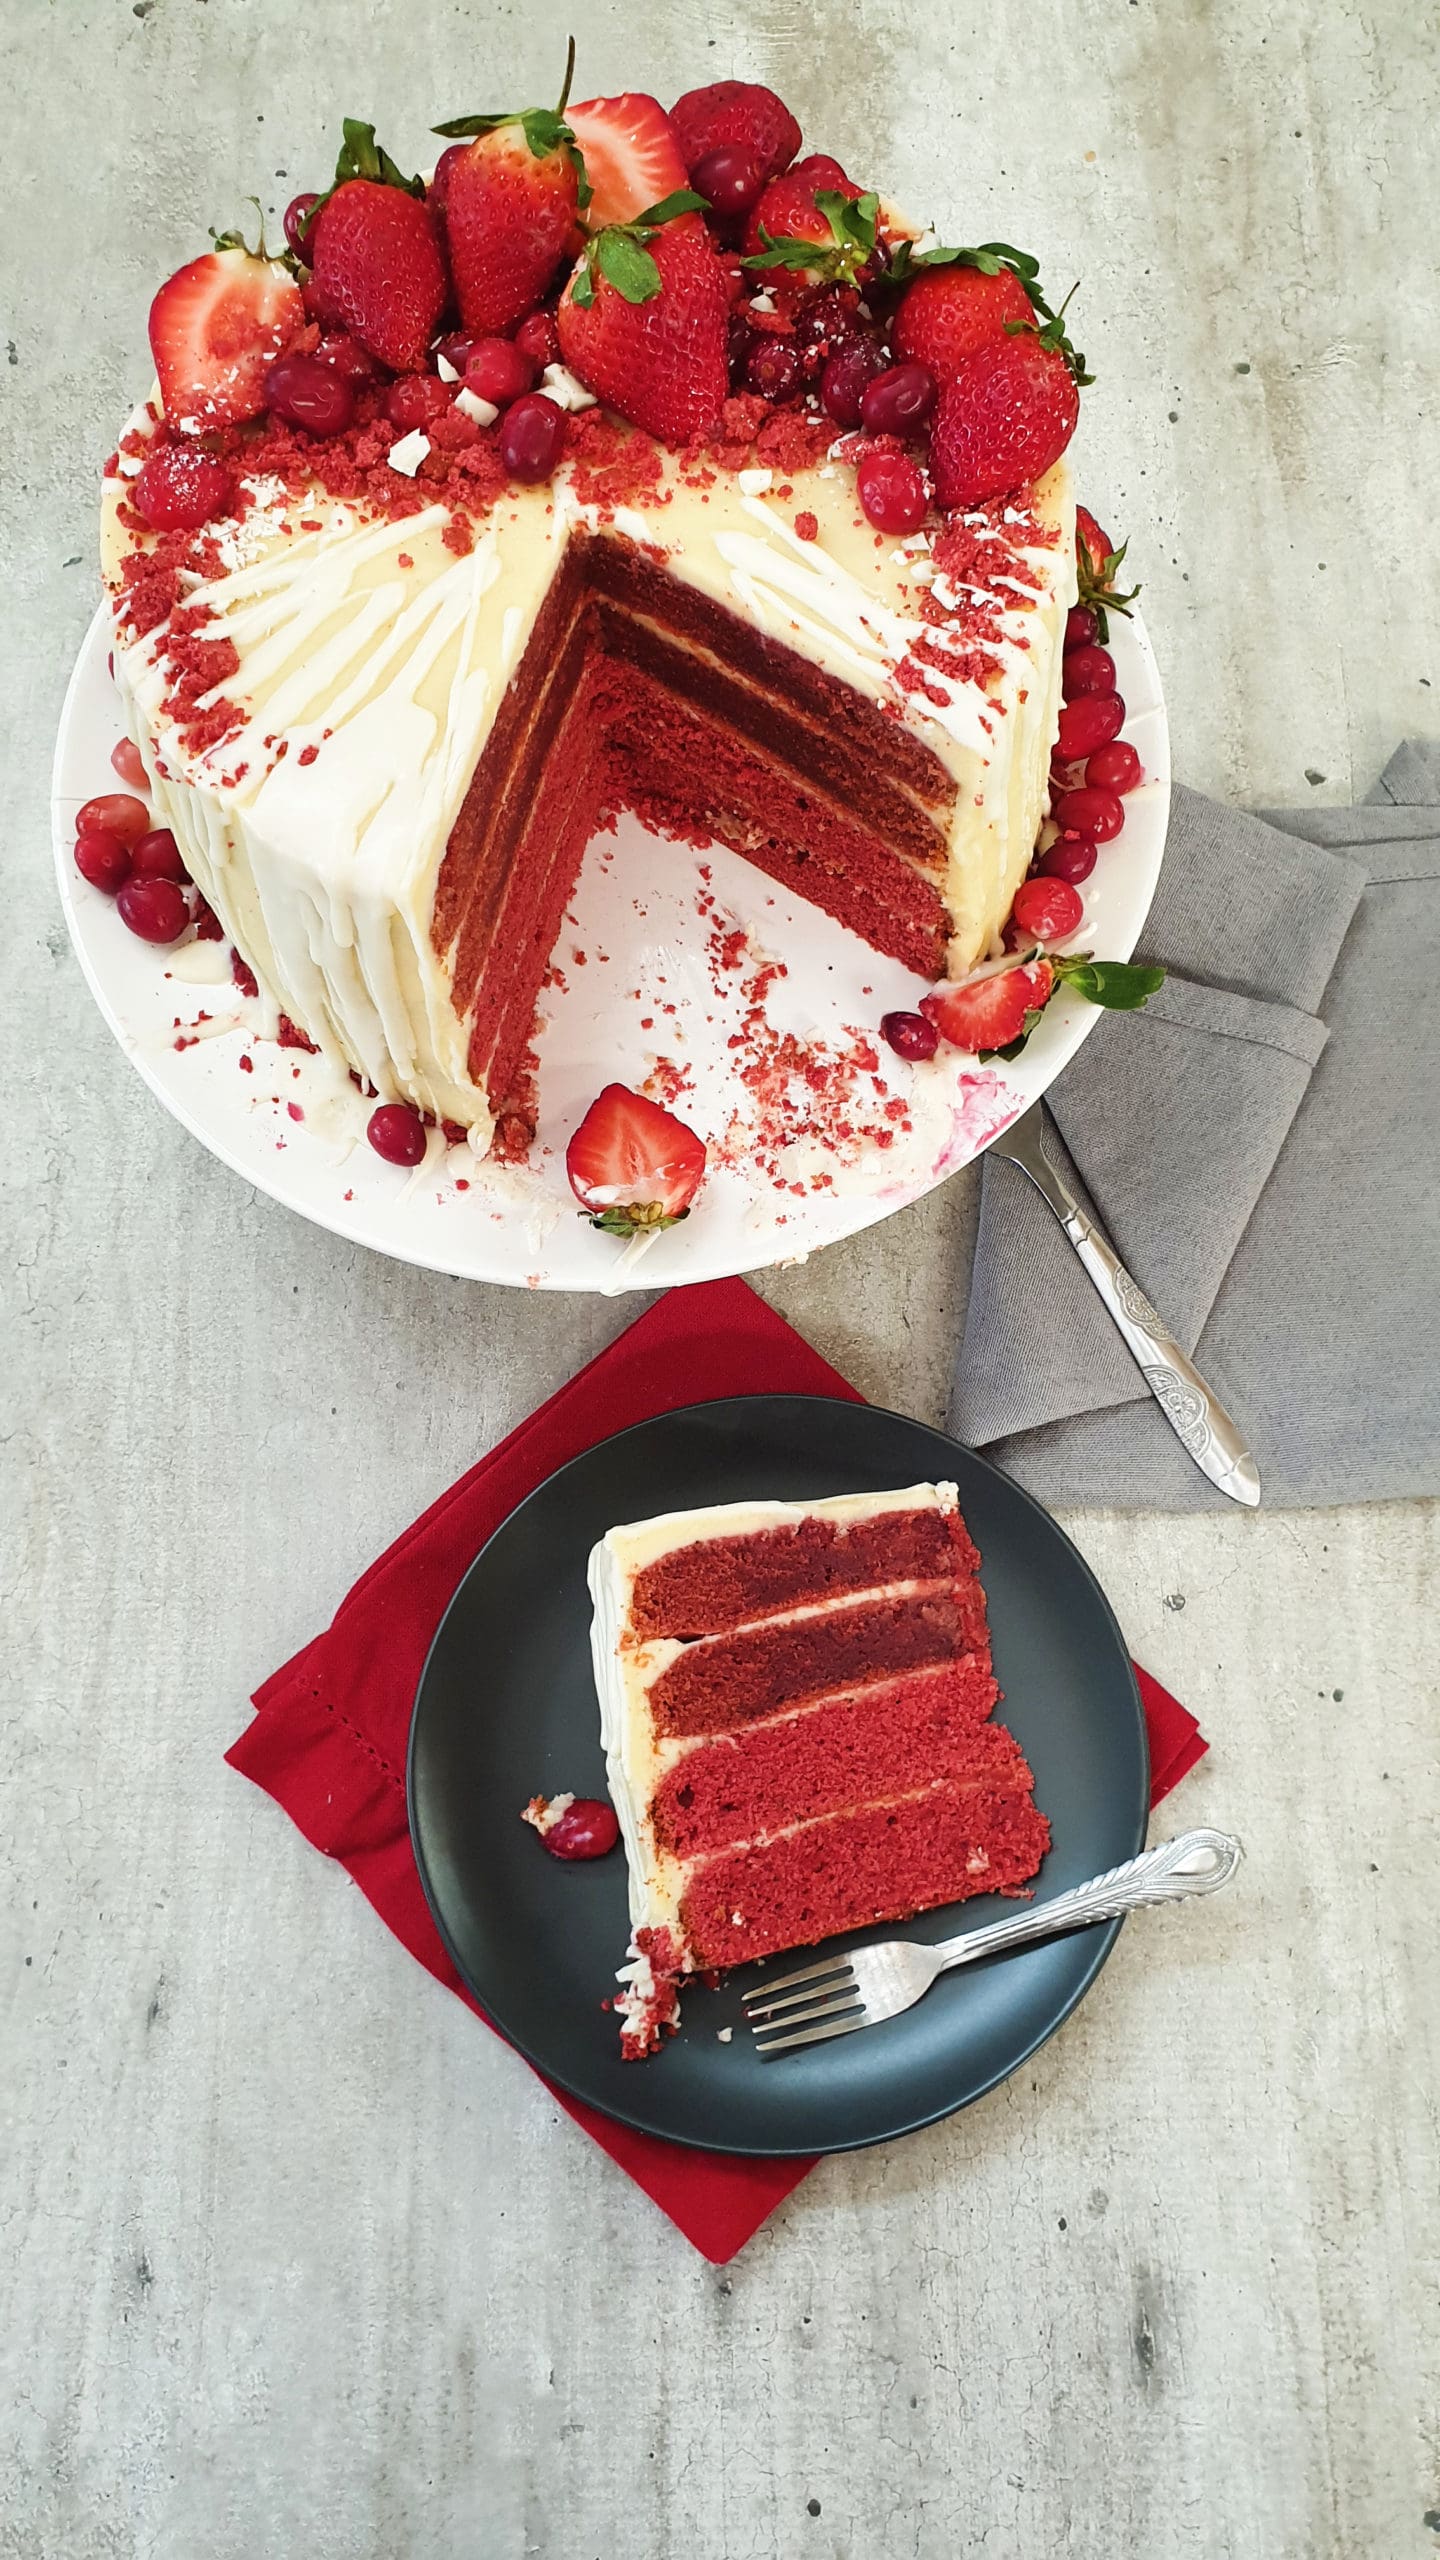
4 Layered Ombre Birthday Cake
This recipe features a 4 layer Ombre Birthday Cake which was made using fresh beetroot and berry powder which gave it these gorgeous layers! The creme fraiche icing/frosting is so good it will leave you speechless. You fall in love with every bite!!
Ingredients
These ingredients are enough for 2 cakes in this cake tin size. For 4 layers, make the the 1st 2 cakes and then repeat the same recipe for the next 2 cakes.
- 2 ½ cups cake flour 320 grams
- 2 cups sugar
- 1 teaspoon baking powder
- 1 teaspoon salt
- 1 teaspoon vanilla essence
- 1 tablespoon apple cider vinegar
- 1 ½ cups canola oil vegetable oil
- 2 tbsps cocoa organic, sugar free
- 2 tbsps cocoa
- ½ cup unsalted butter room temp to soft
- 1 cup buttermilk
- 2 beets cooked
- 2 tbsps beetroot powder
Frosting/Icing
- 1 ½ cups room temperature unsalted butter
- 600 grams icing sugar
- 250 ml creme fraiche
- 1 ½ tbsps vanilla essence
- ½ cup thick whipping cream beat into a stiff peak
- tiny pinch of salt
Instructions
Cake Method
- Grease the cake tins. Grease the cake tins, 4 x 23cm round spring-form tins (Baking 2 cakes at a time)Cut round circles on the baking paper to fit the bottom of the cake tins (you may as well prepare all of them now) Place the circled baking paper down and make sure the top of the tin (where the clip is) sits perfectly over the paper. Lock the top in, turn it over and cut the edges of the paper off. Please see note Note 1 for more on this.Use cooking spray for over the paper as well. Flour the tins and set aside.
- Heat the oven. Heat the oven to 170 C and make sure the rack is in the middle of the oven.
- Dry ingredients. Sift the flour and cocoa into a large bowl. Add the baking powder. Add the salt and use a whisk to combine all the dry ingredients together. Set aside.
- Sugar & butter. In a separate bowl add the soft butter (below room temperature for better results) and sugar and using a hand held electric mix, beat until well combined. About 1 minute if your butter is soft and 2 minutes if the butter is a little colder than room temp.
- Wet ingredients. Add the oil, sugar, vanilla, eggs, cider vinegar and beat using the electric stand mixer. Return the dry ingredients from earlier and add them into the wet ingredients. Add the dry ingredients in 2 to 3 parts alternating with the buttermilk and run the mixer after each addition.
- Red Coloring. Add the beet puree (method below) and using a spatula, fold the puree into the batter till well combined and there are no white parts in the batter. Use the same method for the other 2 cakes but use the beet powder instead of the beet puree if you want the same shades of red as the cake in this recipe.
- Batter. Pour the batter between the two prepared cake tins and place in the middle shelve of the oven to bake.
- Baking. After 18 to 20 minutes of baking check the doneness with a toothpick. If if comes out clean (probably will) take them out and leave them to cool. If the toothpick is damp leave them another 3 to 5 minutes but not long because they will either burn or dry out. These cakes should be ready in about 20 minutes. With a gentle touch with the tip of your finger on the top of the cake will tell you if its ready. If the cake bounces back its ready.
- Cool down. Let the cakes cool down in the tins completely before fiddling! About 10 to 12 minutes. Gently unclasp the side clip and remove the cakes from the bottom tray, peel off the paper and leave to cool until properly cold.
BEETROOT METHOD
- Place the beetroot in a microwave dish and cook till done.
- Peel the beetroot, discarding the peels but keep the red water!
- Roughly cut into pieces, use the water from boiling them, about a tablespoon or 2, into a blender and blend into a puree. When adding the water from the beets to the blender, add by the tablespoon because you might only need one! It's only to get the blender going.
CAKE ICING/FROSTING
- The butter must be soft, add it into a bowl and add the creme fraiche. Use a spatula to mix the two together. It will take about 5 minutes. The less you beat the icing the better hence we are using a spatula and only use the electric mixer below when adding the icing sugar. Once combined, add the vanilla essence, salt and mix it in with the spatula.
- Now its time to add the icing sugar and you can switch to the electric mixer. Add the icing sugar gradually, in batches, use the electric stand mixer, add icing sugar, keep alternating until all the icing sugar is incorporated and then run the mixer on high for a minute or two.
- Add half the cream, run the mixer on high speed for a split second. If you want it smoother add a little more of the cream but eye ball it to see how smooth you want the icing. Leave the icing in the fridge to set for 30 minutes before using. Please see Note 2 for more on this.
ICING THE CAKE
- When ready to ice, start by using a serrated knife (makes it easier) to slice the top of the cakes off if your cakes are different sizes however using these measurements and trying to have as close as possible of the batter equally divided in the cake tins they should be as close as possible to being the same size. Only a thin slice of the tops should be sliced off and perhaps not even from all the cakes. For this recipe the only cake top that needed shaving was the one that was going right on top not the rest. See the image in Note 3.
- Now place your first cake on cake stand (for height) and use an icing spatula (long flat knife) or a regular long knife and start creaming the first cake, add the next cake, cream and so forth till all the cakes are on top of each other with a layer of cream between. See the image in the notes section.
- Spread the icing around the cake and then leave the cake and the icing in the fridge to set for a minimum of 30 minutes before the next icing layer. The cake in this recipe had one more icing layer, on top and around and then stayed in the fridge over-night. The next day (or 30 minute intervals) give the cake its final icing layer. Smooth it out with a knife the best that you can and when you are done leave it in the fridge again for 15 minutes to settle before adding the strawberries and cranberries for decoration as well as the crumbs from cutting the tops off.
Notes
Note 1.
Grease the entire cake tin on the inside with a little butter. Cut out a circle of baking paper and place it on the bottom part of the greased tin. Make sure that the paper is locked into the pan (if using a spring-form pan) and is not loose on the inside of the tin or the batter will seep through and leak! So make the paper big enough to cover the bottom of the pan and then fit the top of the pan on, lock the side clip, turn the pan upside down and use a scissors to cut of the extra paper underneath.- Grease the tins with a butter
- place a cut-out circle over the bottom
- make sure the paper is firmly through to the back of the tin
- turn the tin over and cut off excess paper
- use cooking spray to spray over the baking paper
- add a little flour and shake it over the inside as well.
- your tins are prepped and ready for the cake batter!
Note 2.
When making the icing you don't need to use all the whipped cream. The cream is to give the icing that creamy thick finish so you might need half of the half cup so it's best to add a bit at a time.Note 3.

DID YOU MAKE THIS? We love seeing what you made! Tag us on Instagram @anosmickitchen #anosmickitchen