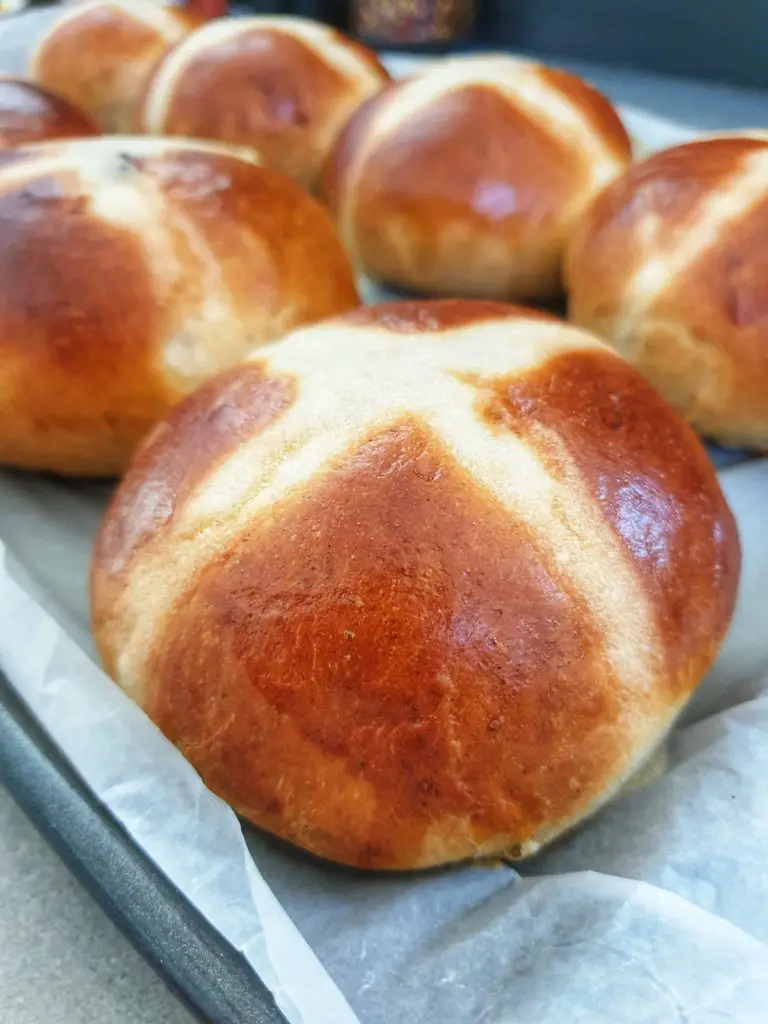
South African Hot Cross Buns (Soft, Spiced & Glazed)
South African Hot Cross Buns for Easter
In South Africa, Easter and hot cross buns go hand in hand — right alongside Pickled Fish, a beloved South African Easter tradition.
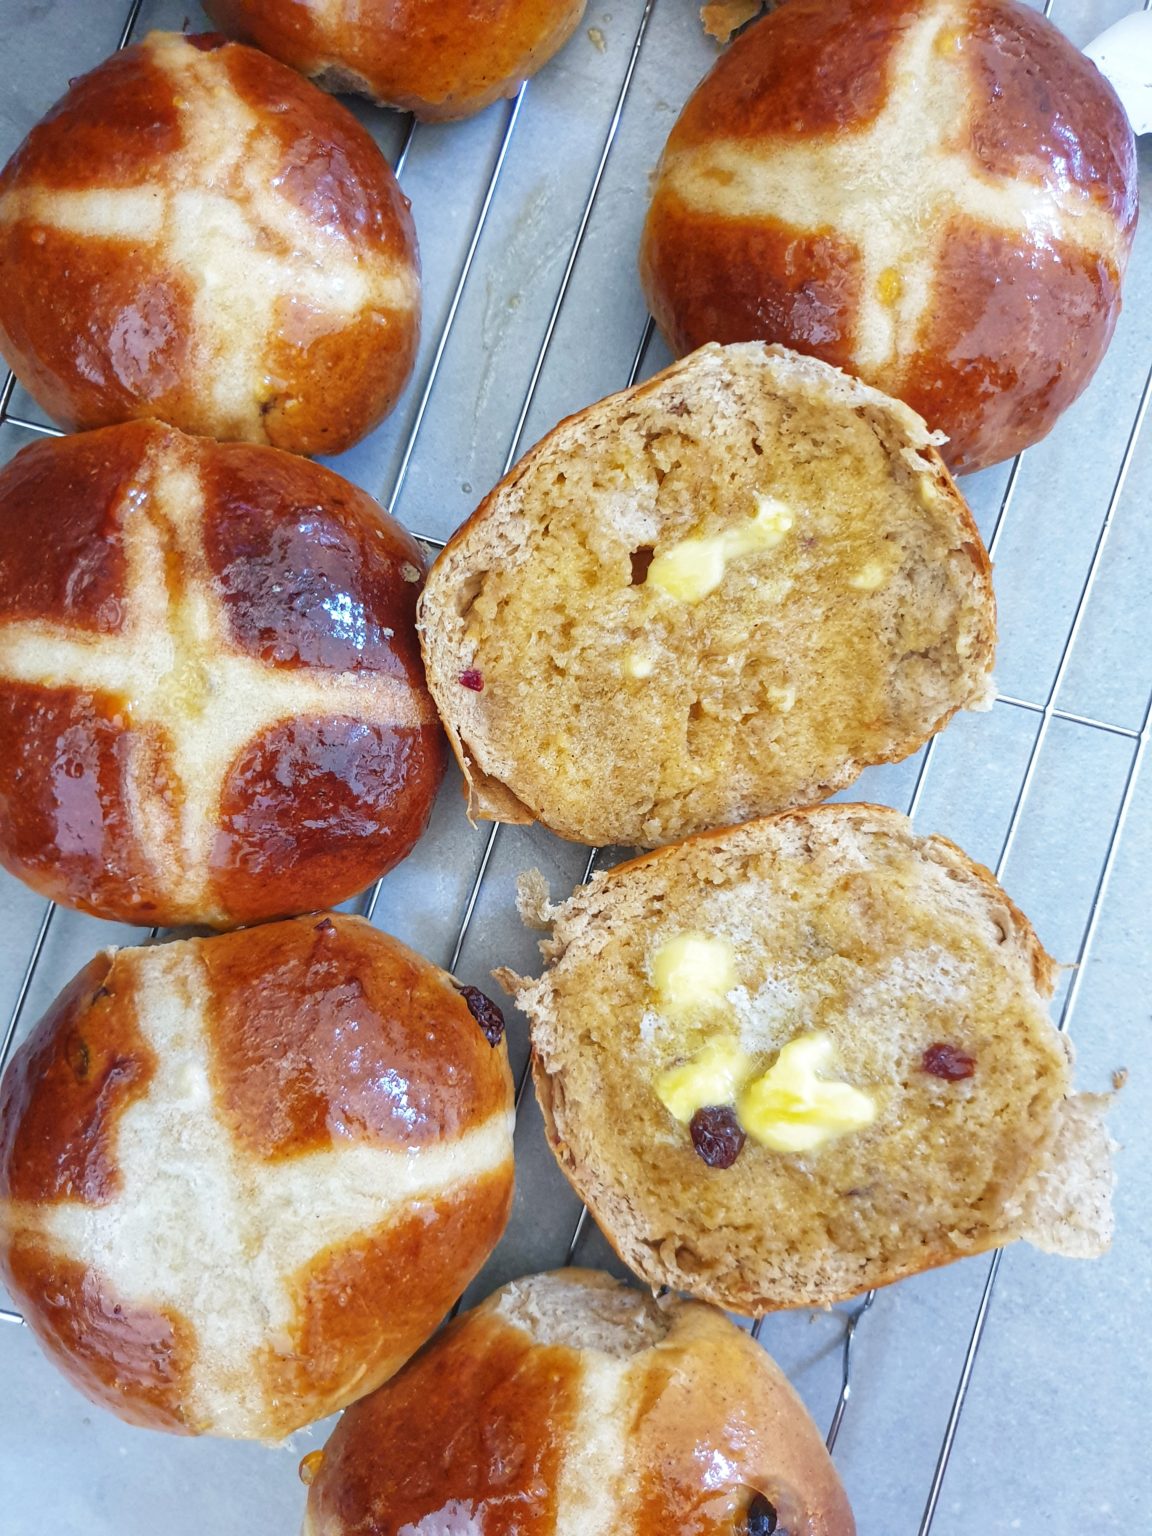
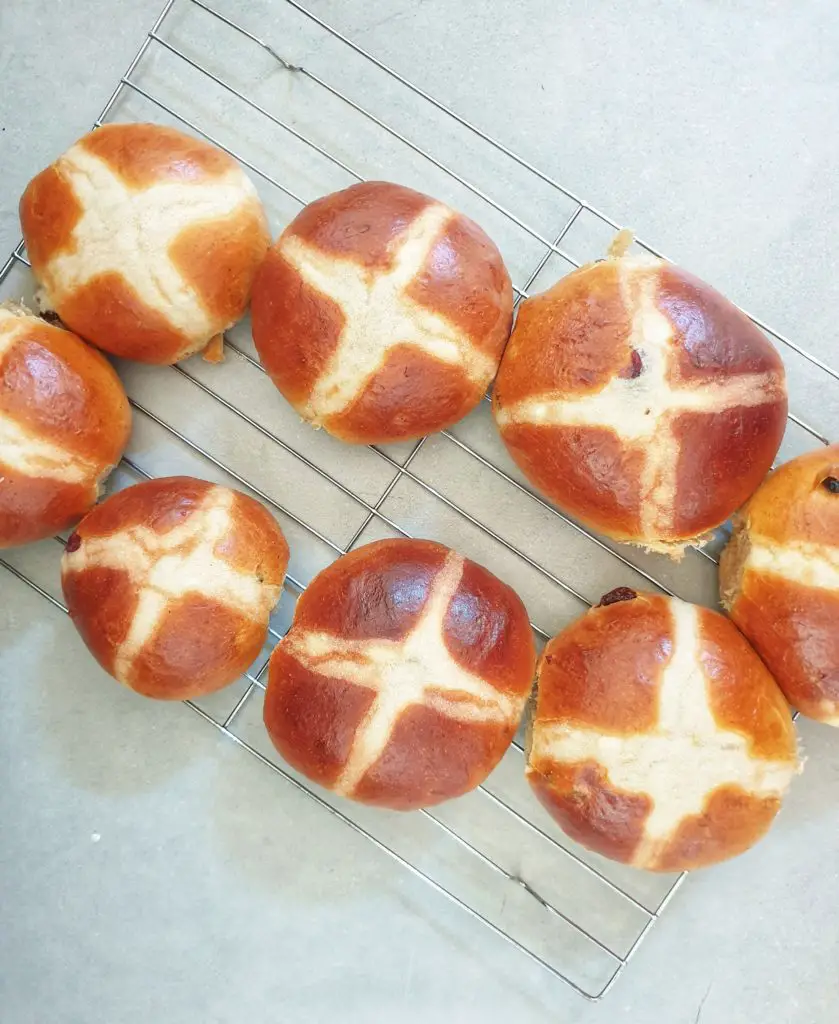
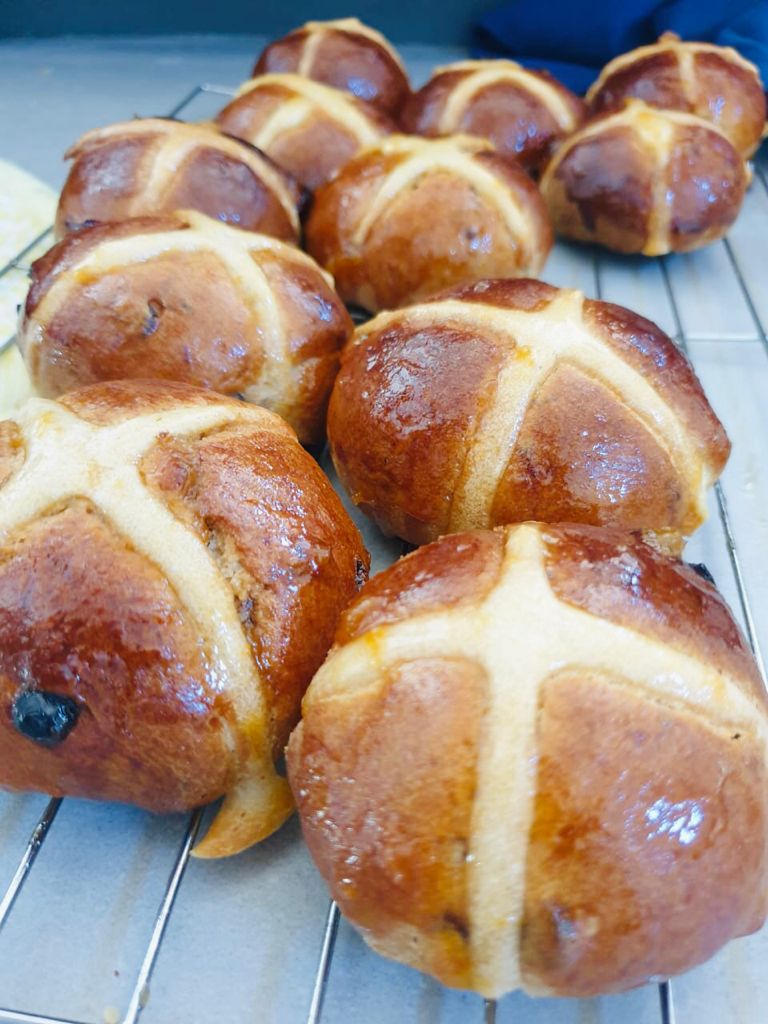
These buns are made with muscovado sugar for a subtle caramel warmth, warm spices for depth, and a simple flour cross that bakes into that familiar symbol of Easter. They’re tender, comforting, and deeply nostalgic — the kind of recipe that carries memory in every bite.
This recipe is especially close to my heart. It reminds me of my mother’s kitchen — trays of buns coming out of the oven, family gathering, and the feeling that Easter had truly arrived.
Why You’ll Love This Recipe
- Can be made by hand or in a stand mixer
- Soft, fluffy texture with a tender crumb
- Warm spice without being overpowering
- Light caramel flavor from muscovado sugar
- Traditional South African Easter favorite
- Perfect served alongside classic South African Pickled Fish or simply warm with butter.
Expert Tips!
Measure by weight
Using a kitchen scale ensures accurate, consistent results.
Don’t overheat the milk
Warm, not hot. Too hot will kill the yeast.
Knead until smooth
The dough should be soft and elastic with no tearing on the surface.
Let the dough fully rise
Be patient — a proper rise gives you soft, fluffy buns.
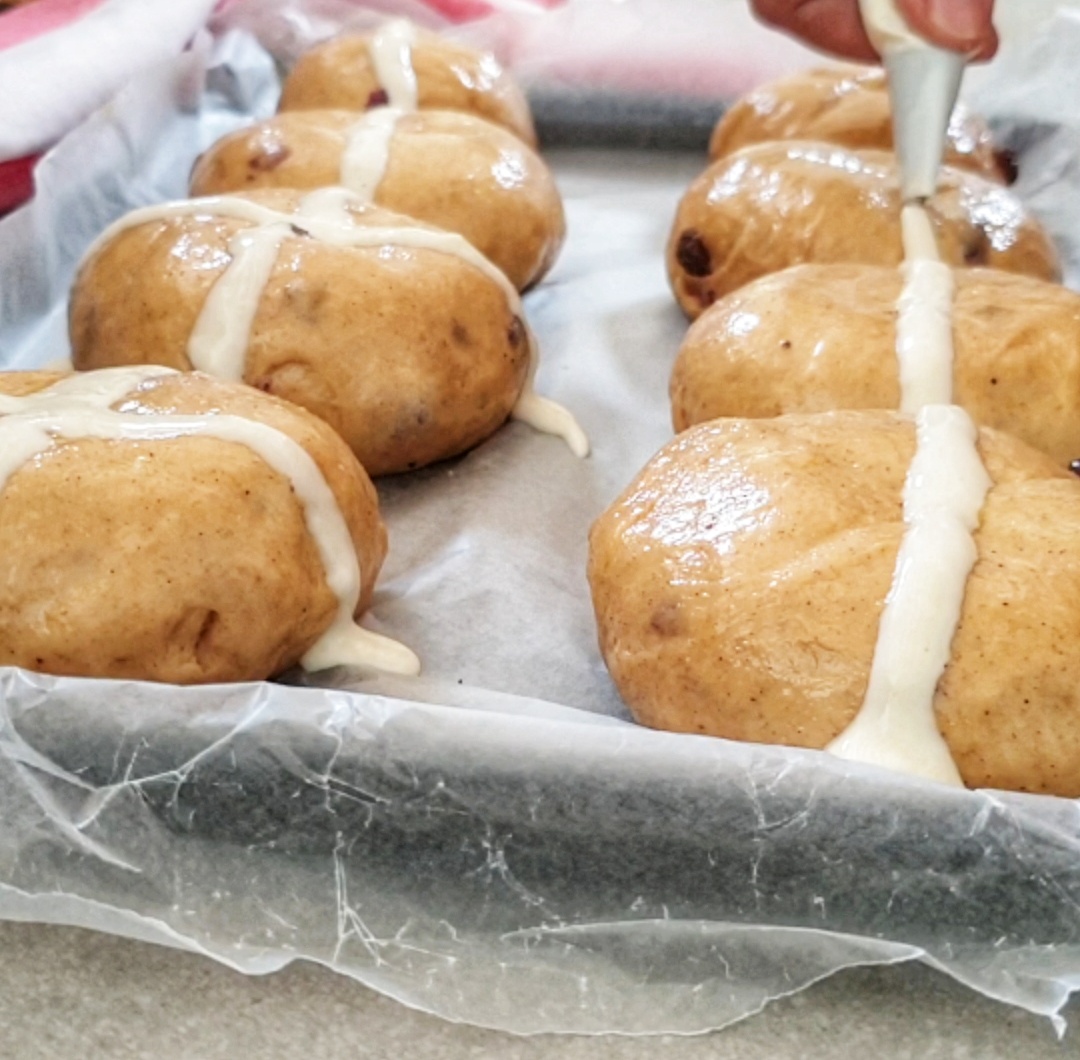
Score before piping (optional but helpful)
Lightly mark the cross with a knife before piping. It helps guide you.
Glaze while warm
Brush with melted butter or simple syrup as soon as they come out for shine and softness.
Variations
- Skip dried fruit entirely if preferred
- Swap raisins for currants or sultanas
- Add orange zest for brightness
- Use brown sugar if muscovado isn’t available
- Add mixed peel for a more traditional version
Storage
Room temperature:
Store in an airtight container for up to 2 days.
Freezer:
Freeze without glaze for up to 2 months. Thaw and warm before serving.
Reheating:
Warm gently in the oven or microwave before serving. These also work beautifully in lunchboxes over the Easter weekend.
FAQ
Can I make the dough the night before?
Yes. After the first rise, refrigerate overnight. Bring to room temperature before shaping.
Can I knead by hand?
Absolutely. It just takes a little more time and arm strength.
Why didn’t my buns rise?
Most commonly: yeast was expired or milk was too hot.
Do I have to pipe the crosses?
Yes for tradition — but you can also score deeper crosses before baking.
If you’re looking for more traditional South African Easter recipes, don’t miss my Pickled Fish and full Easter lunch menu.
Planning your Easter table? Pair these buns with my full South African Easter Lunch Menu for a relaxed, traditional spread.
More From My Kitchen
- South African Easter Lunch Menu
- Classic Pickled Fish & Festive Table Inspiration
- Creamy Coffee Smoothie
- With Almond Butter, Naturally Sweet & No Banana
- Berry Summer Parfait
- Fresh Layers of Yogurt, Berries & Crunch
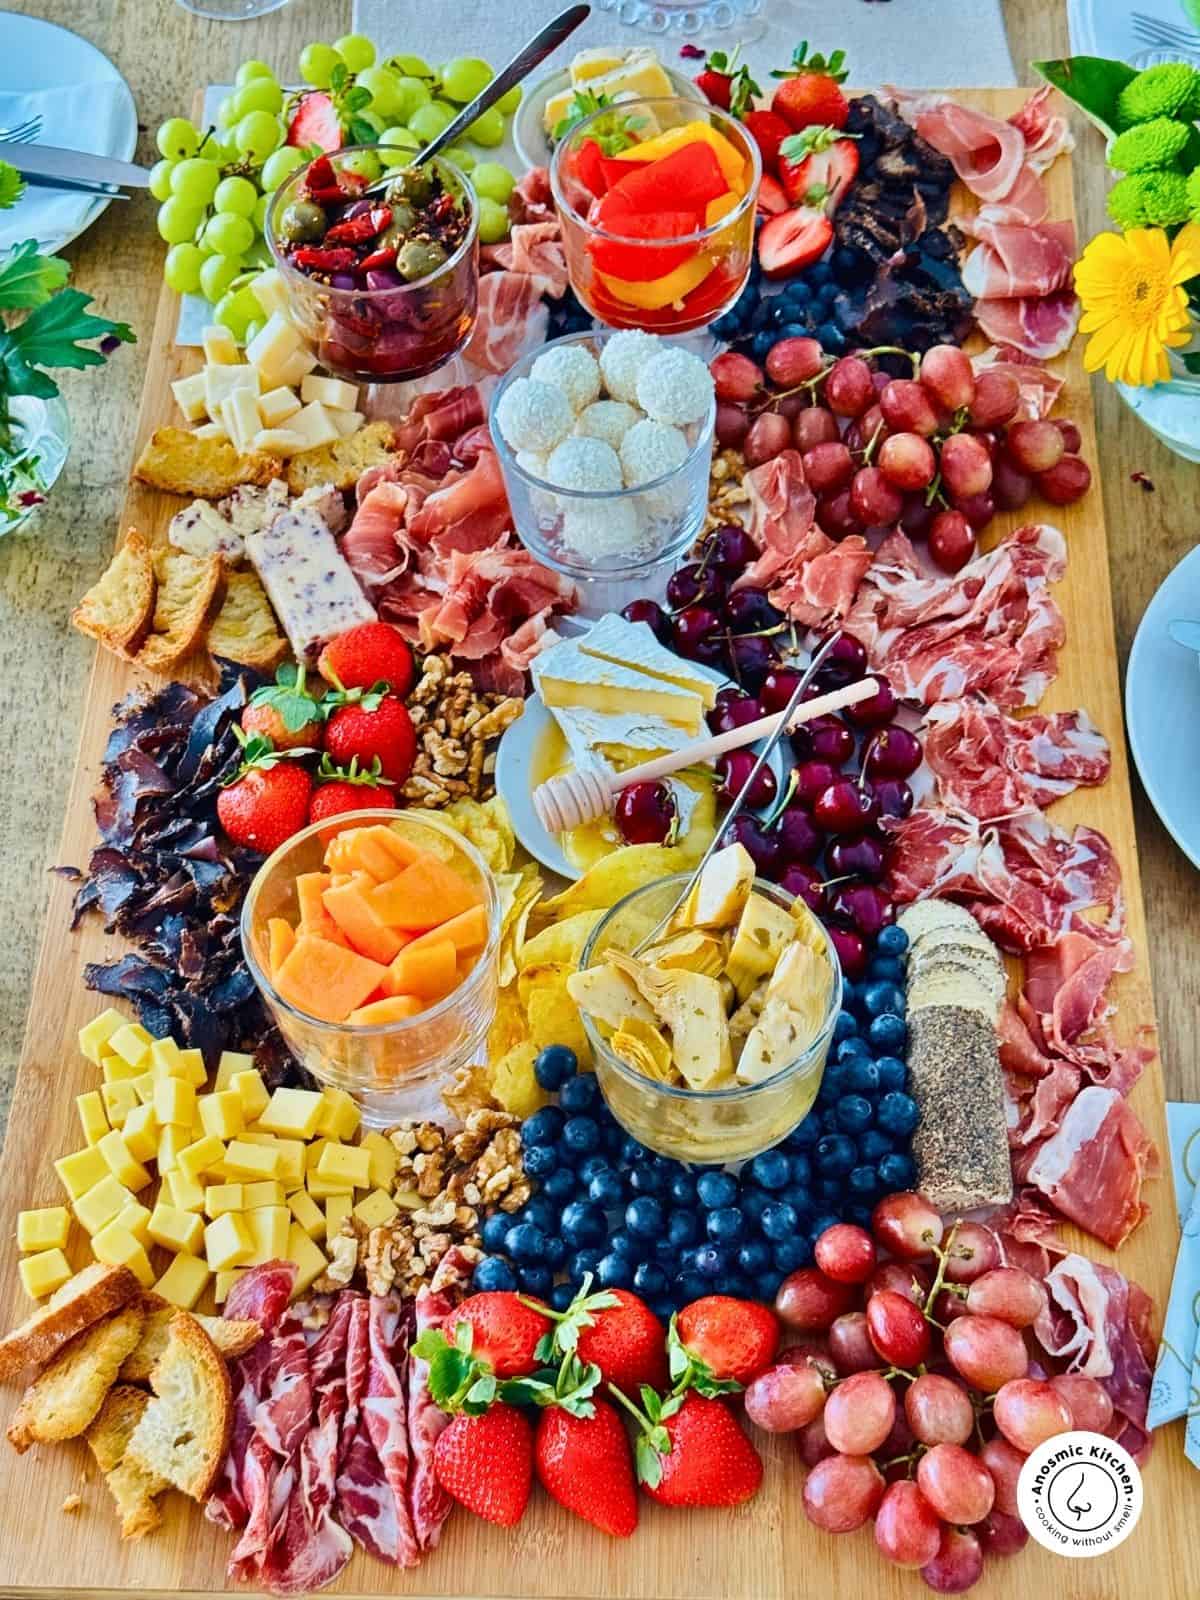
- Grazing Board for Entertaining
- Effortless, Abundant & Perfect for Sharing
If you make this recipe, I’d love to hear how it turned out. Your comments help other readers and are always one of my favorite parts of sharing recipes online.
South African Hot Cross Buns
Ingredients
For the Dough
- 500 g cake flour
- 75 g muscovado sugar
- 1 tsp salt
- 2 tsp ground cinnamon
- ½ tsp mixed spice
- 10 g instant dry yeast
- 300 ml warm milk
- 50 g butter melted
- 1 large egg
- 1 tsp vanilla extract
- 100 g raisins or currants
For the Cross
- ½ cup flour
- 4–5 tbsp water to form paste
For the Glaze
- 2 tbsp melted butter or simple syrup
Instructions
- In a large bowl, whisk together flour, sugar, salt and spices.
- Warm the milk (not hot). Stir in yeast and 1 teaspoon sugar. Let stand 5–10 minutes until foamy.
- Add melted butter, egg and vanilla to the milk mixture.
- Combine wet ingredients with dry ingredients. Add raisins and mix to form dough.
- Knead by hand (8–10 minutes) or with a dough hook (4–5 minutes) until smooth and elastic.
- Place dough in a lightly oiled bowl. Cover and let rise until doubled (about 1 hour).
- Punch down and divide into 12 equal pieces. Shape into smooth balls.
- Place on lined baking tray. Cover and let rise 30–40 minutes.
- Preheat oven to 180°C (350°F).
- Mix flour and water into thick paste. Pipe crosses over buns.
- Bake 20–25 minutes until golden brown.
- Brush with melted butter or syrup while warm.
Notes
- Milk must be warm, not hot.
- Buns freeze well without glaze.
- Store in airtight container for 2 days.
Leave a Comment & Rate this Recipe
If you love this recipe, please consider giving it a star rating when you post a comment because the star ratings helps other people like you find my recipes online and that means so much to me thank you! Miranda, xoxo