Easy Crusty Bread for Dipping in Olive Oil – Homemade Loaf Recipe
If you love dipping warm, fresh bread into olive oil and herbs, this easy crusty bread recipe (made with olive oil) is for you! No mixer necessary, no overnight in the fridge. All you need is a bowl, wooden spoon and six simple ingredients…

This bread surprised me! It was not supposed to come out this good but the minute we broke into it I did a little dance from happiness, that’s what cooking is for me. I’ve been trying to get the right texture to pair with my olive oil bread dip. Something crunchy, crusty, airy and light all at the same time – spongy like focaccia with the crunch of ciabatta. Here’s the real booster – you don’t even need to slice it!
You will see that this dough is very weak and actually wet in the beginning but as we gradually add flour it becomes a little more weighty. However, you don’t want it to be very tight otherwise we are then undoing what is intentional. What’s intentional? Getting the balance of a ciabatta type bread without the stretching, starter dough (biga) and any overnight proofing.
Those cracks in the bread (image below) makes it easy to break off. The bottom is golden brown, oh I wanted to take a photo for you but had to rush the photos, eager beavers waiting around to break it:)

Recipe Notes
This bread recipe is perfect for dipping in olive oil or serving alongside any appetizer platter. You’ll love the crisp golden crust and soft, airy middle, making it a great choice for various occasions.”
- Make sure to preheat the oven. If you preheat the oven for 10 minutes, it’s simply not long enough for bread. Give it more time, I suggest 30 minutes preheat time.
- A Dutch oven makes it easier to achieve the same results. However, I have tips and tricks for you if you don’t have a Dutch oven. It won’t be the same, but it will pretty close.
- Be patient. There is no overnight proofing and no kneading, but you do need to attend to the dough after each proofing time and set a timer for the baking time.

Here is the ingredient image below but I forgot to add the salt and after doing LOT’s of takes on the recipe testing, there was no way I was gonna take another photo for salt. Besides it would’ve been awful since I use natural light for my photos. You can be 100% certain there’s salt in the actual recipe (see the recipe card below this post for full measurements).

Ingredients for Easy Crusty Bread Recipe
See the recipe card below this post for full measurements.
- Flour – a combination of cake wheat flour and bread flour
- Yeast – Active dry yeast
- Water – Tepid temperature
- Salt –
- Olive oil – Extra virgin olive oil
- Sugar
How to Make This Crunchy Bread For Dipping
Here is a step-by-step method with images on how to make a beautiful crunchy homemade bread. We start off by proofing the yeast. Even though there are recipes that add the yeast directly to the flour and it’s on some yeast packages that you buy ‘no need to wait 5 minutes‘. I prefer the old school method to be sure that the yeast is indeed active. If you get no bubbles it may not rise in the dough anyway.
Step 1. Proof the Yeast
Add 1/2 cup of warm water into a measuring jug or bowl. The water temperature should be warm, not hot, not cold. Warm water and pour in the dry yeast, stir and set it aside for 5-10 minutes for bubbles to form. Should you cover it? Pssst – I do.
Step 2. Mix the dough
Mix the flour and salt together in a large bowl. Stainless steel, glass or a plastic bowl, they all work. To the flour and salt, pour the proofed yeast mixture in, the olive oil, sugar and the remaining warm water. Mix these ingredients together into a soft dough.


Step 3. Add water
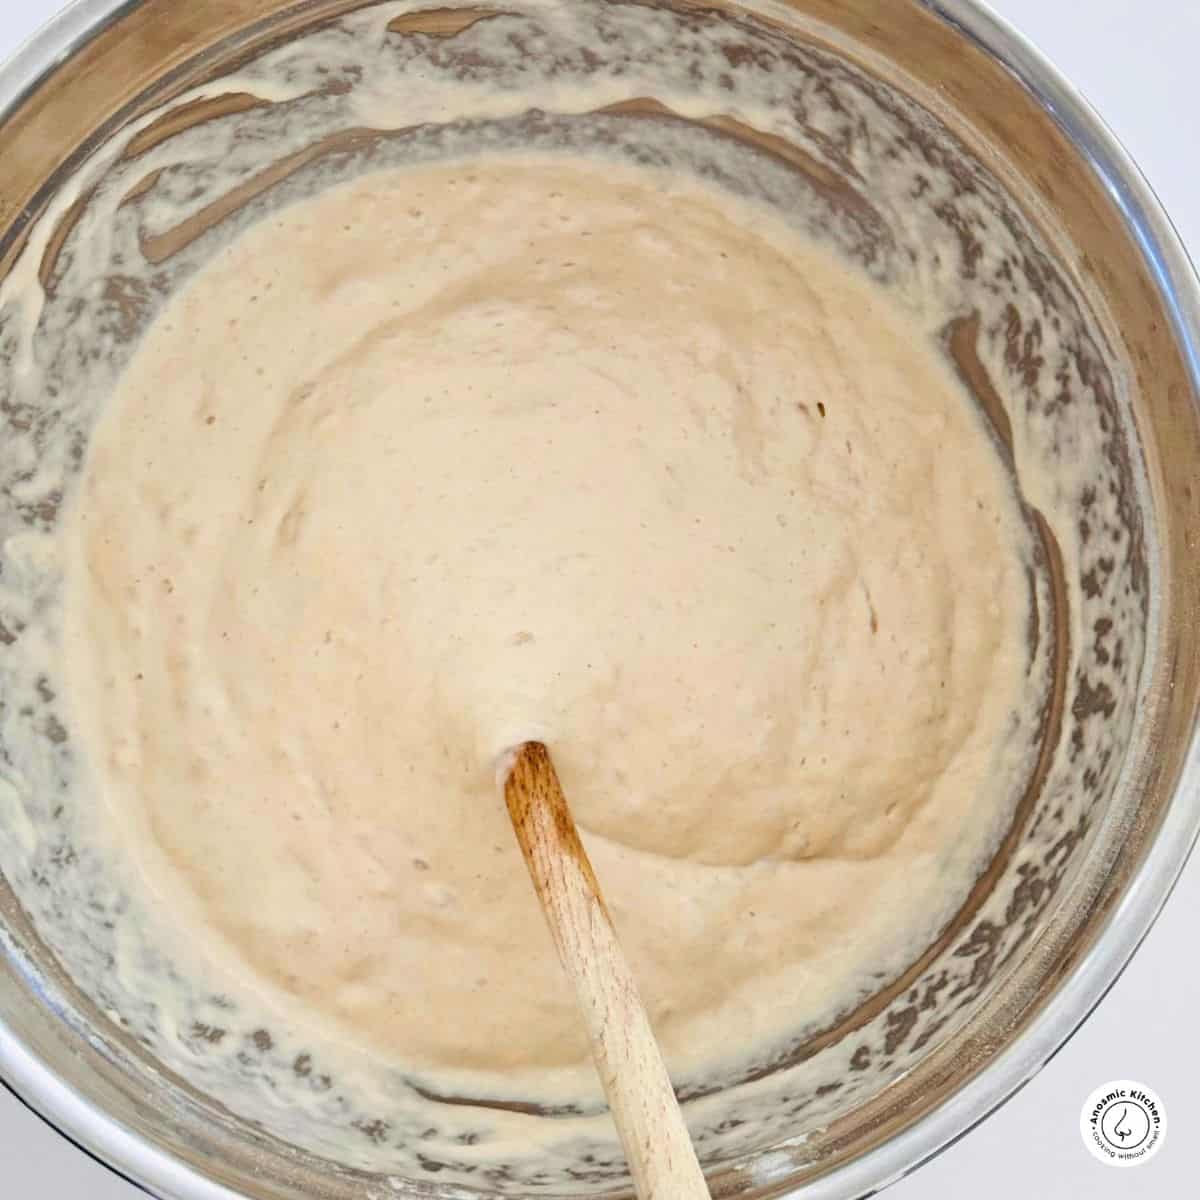
You can see the consistency of the ingredients below which is like a regular bread dough but we are going to tamper with that by adding more warm water into the already ‘correct’ bread dough. I don’t suggest adding cold water, we need to keep the temperature of everything the same. My suggestion is to use the same kind of warm water you used for the yeast.


Step 4. First dough proofing
Mix for about 3-4 minutes (arm muscle) lifting the spoon slightly with each fold to create air bubbles. Tilt the bowl slightly, the batter will be at the bottom of the bowl making it easier for you to scoop it up while mixing. So one hand holding the bowl, tilt the bowl, and the other hand is lifting the dough in scoops. Just as you would do when whisking. With a few air bubbles, cover the bowl and leave for 1 hour.


After an hour, nothing much would have happened besides more air bubbles. That’s a very good sign that’s why it’s important in the step above to lift your arm and mix, mix, mix.

Step 5. 2nd Proofing: Add flour
For the 2nd proofing, we are going to add 1/2 cup of flour in two parts folding it in after each addition. Mix the flour in, you will notice the dough consistency will be thicker, cover and leave for an additional hour. You can still mix it properly to make sure the flour is well distributed but you don’t have to do vigorous lifting and mixing in this step. Cover and leave for another hour.


Step 6. Prepare to bake
You will see more air bubbles so get the wooden spoon again and mix for 1-2 minutes nothing hectic. This dough is softer than a regular bread dough so you need to contain it. Normally with a no knead bread dough, you can keep it on parchment paper while the stove preheats. This one, you can’t if the dough it too weak which in this case, it is. So this is how I do it:
Take 2 pieces of parchment paper and fit them into a small to medium size bowl. The paper should run across each other to create a sitting place at the bottom. Then pour the dough into the bowl making sure it drops in the middle of the parchment paper.

Flour your hands and gently pull the dough from the sides, not to re-arrange it, because you can’t do that but to try and add a little flour to the edges. If you try and add flour to the paper before it will all drop to the centre, which is fine but we add little flour around the edges too. Sprinkle flour over the top of the dough and if it happens to pile in one spot, just use a knife or spoon to move it around. It will create a fun design anyway so it’s okay.
Preheat the Oven
Now that we have contained the dough, cover it and pepare the oven. Move the rack to the lower part of the oven, with enough space on top for the lid. Place the Dutch oven on the rack. Note: I use a solid oven tray that fits into the oven instead of placing the large pot on a rack, although you can. Preheat to 220°C/428°F for 30 minutes. The reason we did not pour the bread dough directly into the Dutch oven is because it needs to preheat with the oven at the same time.


Bake
With oven gloves, carefully remove the Dutch oven and using the parchment paper, lift the bread dough out of the bowl and gently drop it into the Dutch oven, cover with the lid and bake for 30 minutes. After 30 minutes, again, use thick gloves everything is very hot! Remove the lid and continue baking for 10 to 15 minutes or until the top is golden brown.
Recipe Tips
- Please be careful of preheating the oven and then adding the Dutch oven aftwards, this is not at all safe. They need to come to temperate at the same time. This is tip from a le crueset sales assistant.
- This recipe can also be made in pyrex dish. Follow the recipe as above and mix the ingredients inside an oven safe dish. I use a pyrex dish since it can take the high temperature.
How to Bake This Bread Without A Dutch Oven
Bake it in a pyrex dish as mentioned above and if you don’t have a pyrex dish or a Dutch oven pot then use a baking tray, you will need two. Not a baking sheet, a baking pan, something with high edges that you use for Sunday roast chicken with potatoes! Place a sheet of parchment paper on a work surface and then pour the dough on top. Flour your hands (you’ll need a bit more flour here) and pull the dough in to the centre. Work it gently until you have it pretty much tight on the edges.
This can be done while the oven preheats with the one oven tray inside. Then when it’s time to bake, lift the sides of the parchment paper with the dough on and gently drop it onto the hot baking pan. Now take the 2nd baking pan and cover the dough and bake as per recipe. Don’t forget to take the top oven tray off after 20 minutes so the top can bake till golden brown. In the images below is an example.


Remember that working with bread dough is easy and very forgiving but everything you do with the dough, will affect the outcome. It will still be good but different. You can see the image below, same recipe, different technique in terms of handling the dough, proofing times, how much flour you add to how you lift and fold if at all. Play around, use my recipe as a guide, eventually you will find your own perfect loaf.
“Perfect is not no flaws, it’s the flaws that make it unique and yours.”

Serving Suggestions
This bread pairs beautifully with dipping oils, antipasti, or even soups. It offers the perfect balance of a crisp golden crust and a soft, airy middle, making it an ideal companion for any appetizer platter.
- Serve this crusty dipping bread with my Olive Oil Bread Dip for a true Mediterranean eating experience!
- Add this dipping bread on a platter with other antipasti ingredients like olives, artichoke, roasted peppers, sun-dried tomatoes and so forth.
- Serve it with soup, we all love a crunchy bread with any bowl of soup.
- This is a very versatile bread especially because you don’t need to slice it up, so break pieces off at the table on a board. Have this Olive Oil Bread Dip on the table, you’ll be amazed how it brings people together lingering at the table over conversation. You can even serve it after a light meal just to finish off the lunch, brunch or dinner in style.

Storage
Store your bread covered loosely in a cool place. I like a loose cotton or linen cloth over so it can breath and then in the oven overnight. For every storage, cover loosely in a large bread bin. If the bread bin is too full your bread will get soft and lose the crunchy texture so drop the cover or change the spot.
To freeze, slice and pack it into freezer bags, it will freeze up to 3 months and when you need it, thaw it overnight in the fridge. If you forget, pop it frozen into the toaster or hot oven to toast. You can make my Italian Caprese Bruschetta once it comes out the oven.

You’ll be amazed at how this easy homemade loaf brings a crisp golden crust and soft, airy middle, making it the perfect addition to any dipping oil or appetizer platter
🛠️ Optional Tools for Best Results
While not essential, these tools can make the bread-making process smoother or more precise:
- Bench scraper – useful for gently pulling or shaping sticky dough
- Kitchen scale – for accurate measurement of flour and water
- Dough whisk – easier to mix high-hydration dough than a wooden spoon
- Parchment paper sheets – pre-cut sheets make handling wet dough easier
- Cooling rack – helps keep the bottom crust crisp after baking
Crusty Bread for Dipping (Easy No-Knead Homemade Loaf)
Equipment
- 1 Measuring cups
- 1 Measuring jug or small bowl
- 1 mixing bowl
- 1 Wooden spoon
- 1 Dutch oven or an alternative like a deep oven-safe baking dish with lid (see post for tips).
- Optional tools: Bench scraper, dough whisk, parchment paper sheets, kitchen scale (for more accurate measurements)
Ingredients
- 190 grams bread flour (1 1/2 cups)
- 190 grams cake wheat flour or all-purpose flour (1 1/2 cups)
- 335 ml warm water, divided (1 1/2 cups)
- 7 grams active dry yeast (1 packet or 2 1/4 teaspoon)
- 12 grams sugar (1 tablespoon)
- 30 ml extra virgin olive oil (2 tablespoons)
- 12 grams salt (2 teaspoons)
- extra flour for dusting
Instructions
- In a jug or small bowl, combine 120 ml (½ cup) warm water, sugar, and yeast. Stir and let sit for 5–10 minutes until foamy.12 grams sugar (1 tablespoon), 7 grams active dry yeast (1 packet or 2 1/4 teaspoon)
- In a large mixing bowl, whisk together bread flour, cake flour, and salt.190 grams bread flour (1 1/2 cups), 190 grams cake wheat flour or all-purpose flour (1 1/2 cups), 12 grams salt (2 teaspoons)
- Add the yeast mixture, olive oil, and remaining 235 ml (1 cup) warm water to the flour. Stir with a wooden spoon until a sticky dough forms.30 ml extra virgin olive oil (2 tablespoons), 335 ml warm water, divided (1 1/2 cups)
- Add 2–3 tablespoons (30–45 ml) more warm water to loosen the dough. Mix by folding and lifting for 3–4 minutes to incorporate air.
- Cover with a towel and let rest at room temperature for 1 hour.
- Add 60 g (½ cup) flour in two additions, folding after each. Cover and proof for another hour.
- Stir gently again for 1–2 minutes. Line a medium bowl with 2 crossed pieces of parchment paper and pour in the dough
- Lightly flour your hands and sprinkle flour around the edges and over the dough. Rest while you preheat the oven.extra flour for dusting
- Preheat your oven to 220°C (428°F) with a Dutch oven inside. Allow at least 30 minutes.
- Carefully transfer the dough using the parchment paper into the hot Dutch oven. Cover and bake for 30 minutes.
- Remove the lid and bake for 10–15 more minutes, until golden and crusty.
- Let cool for 15 minutes before serving.
Notes
Recipe Notes:
- If you don’t have cake flour, use all-purpose. The soft flour helps keep the interior light.
- For the best crust, use a Dutch oven and ensure it’s fully preheated.
- If baking without a Dutch oven, use a Pyrex dish or metal baking tray with another tray on top as a lid substitute.